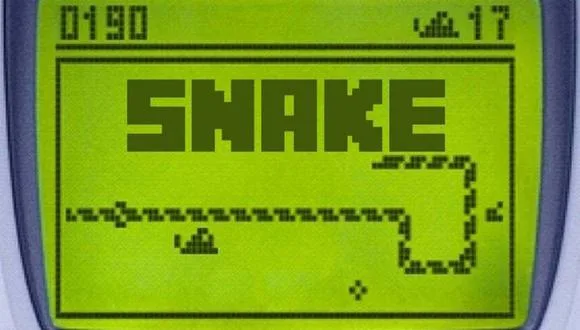
Bienvenidos otra vez a la web 1938.com.es. En el artículo de hoy os explicaremos cómo crear un juego con Angular, más exactamente el juego SNAKE que conocemos muy bien y seguramente much@s de nosotr@s hemos jugado con nuestros Nokia 3310. El resultado de este tutorial lo encontraréis en la siguiente url https://1938.com.es/snake-angular y el repositorio lo podéis encontrar en https://github.com/al118345/snakeGame1938Web. Además, os dejo el siguiente video explicativo:
Si no recordáis cómo se jugaba, es muy sencillo. En este juego debemos guiar a una serpiente a lo largo de un recuadro en el que debemos girar a izquierda, derecha, arriba y abajo con el objetivo de comernos diferentes alimentos. Cada vez que la serpiente recolectaba una de las pequeñas piezas cuadriculadas se obtenía una mayor puntación pero , al mismo tiempo, la serpiente se volvía cada vez más larga, ocupando más pantalla y, por lo tanto, siendo más difícil evitar mordernos a nosotros mismo o evitar los bordes.
Para este proyecto he escogido utilizar un proyecto nuevo en Angular con CSS para definir los diferentes estilos. Por supuesto,
ng new snakeGame1938web --routing=true --style=css
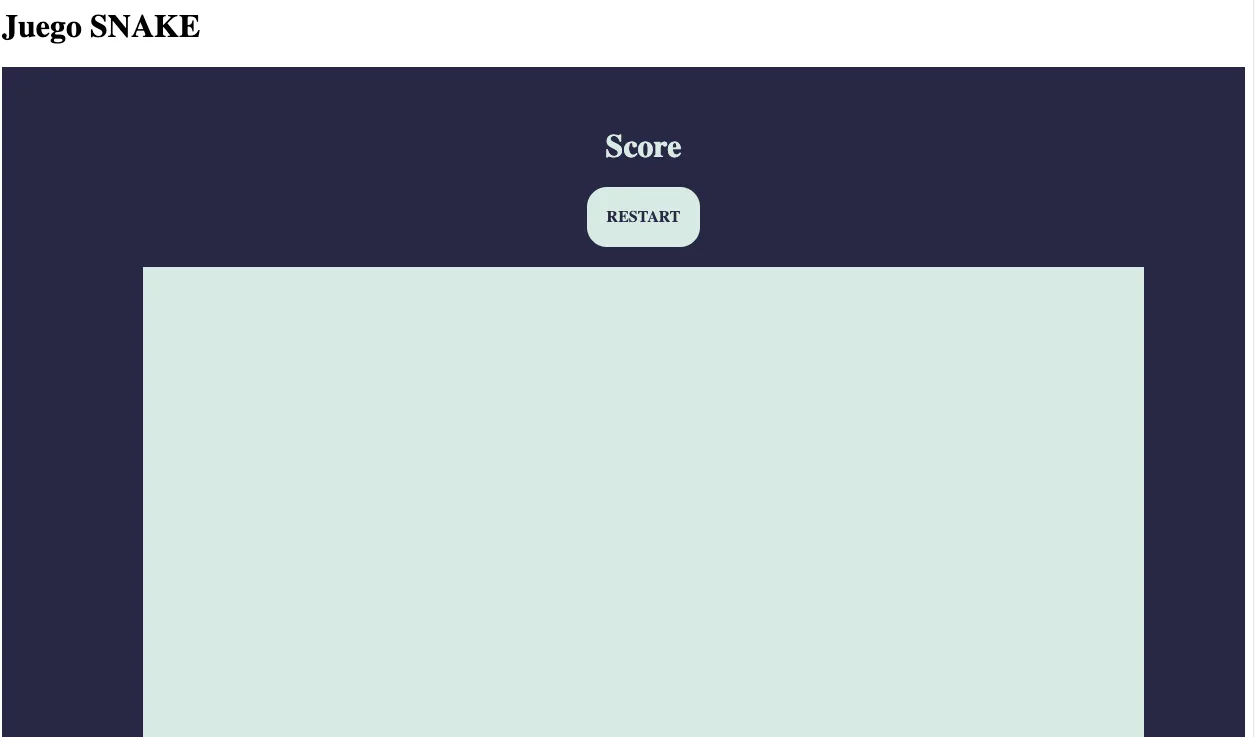
Una vez creado, vamos a definir la estructura básica del juego. Consistirá en crear un simple tablero y además mostrar un marcador. Con este objetivo borraremos el contenido del fichero app.component.html y lo vamos a sustituir por:
<div class="container">
<p></p>
<p></p>
<h1>Juego SNAKE</h1>
<p></p>
<p></p>
<div class="container2" style="background-color: #282846" >
<div class="container2" #fullScreen>
<div class="score-card">
<div class="score-board">
<h1>Score</h1>
</div>
<div class="restart-button" >
RESTART
</div>
</div>
<div class="game-board">
</div>
</div>
</div>
</div>
Además, añadimos los correspondientes estilos necesarios para que la estructura tome la forma correcta.
.container2 {
margin: 0 ;
height: 100% ;
width: 100% ;
display: flex ;
justify-content: space-evenly ;
}
.container2 {
padding: 20px ;
color: #d8ebe4 ;
display: flex ;
justify-content: space-between ;
flex-direction: column ;
align-items: center ;
}
.score-card {
padding: 20px ;
color: #d8ebe4 ;
display: flex ;
justify-content: space-between ;
flex-direction: column ;
align-items: center ;
}
.container2{
display: flex ;
justify-content: center ;
align-items: center ;
flex-direction: column ;
}
.score-card .score-board {
display: flex ;
justify-content: center ;
align-items: center ;
flex-direction: column ;
}
.container2 .score-card .restart-button {
padding: 10px 20px ;
color: #282846 !important ;
border-radius: 20px ;
height: 40px ;
font-weight: bold ;
display: flex ;
justify-content: center ;
align-items: center ;
background-color: #d8ebe4 ;
cursor: pointer ;
z-index: 99 ;
}
.container2 .game-board {
background-color: #d8ebe4 ;
/* width: 100vmin ; */
width: 100vmin ;
height: 100vmin ;
display: grid ;
align-self: center ;
grid-template-rows: repeat(21, 1fr) ;
grid-template-columns: repeat(21, 1fr) ;
}
.container2 .game-board.blur {
filter: blur(4px) ;
}
Ahora nos tocará posicionar a la serpiente y su comida. Para ello vamos a necesitar definir la lógica del juego.
import {AfterViewInit, Component, OnInit} from '@angular/core';
import {Food} from "./game-engine/food";
import {Snake} from "./game-engine/snake";
@Component({
selector: 'app-root',
templateUrl: './app.component.html',
styleUrls: ['./app.component.css']
})
export class AppComponent implements OnInit, AfterViewInit {
title = 'snakeGame1938web';
gameBoard: any;
snake = new Snake();
food = new Food(this.snake);
ngAfterViewInit() {
this.gameBoard = document.querySelector('.game-board');
window.requestAnimationFrame(this.start.bind(this));
}
ngOnInit(): void {
}
start(currentTime: any) {
window.requestAnimationFrame(this.start.bind(this));
this.update();
this.draw();
}
update() {
this.snake.update();
this.food.update();
}
draw() {
this.gameBoard.innerHTML = '';
this.snake.draw(this.gameBoard);
this.food.draw(this.gameBoard);
}
}
Además, hemos añadido lo siguientes ficheros:
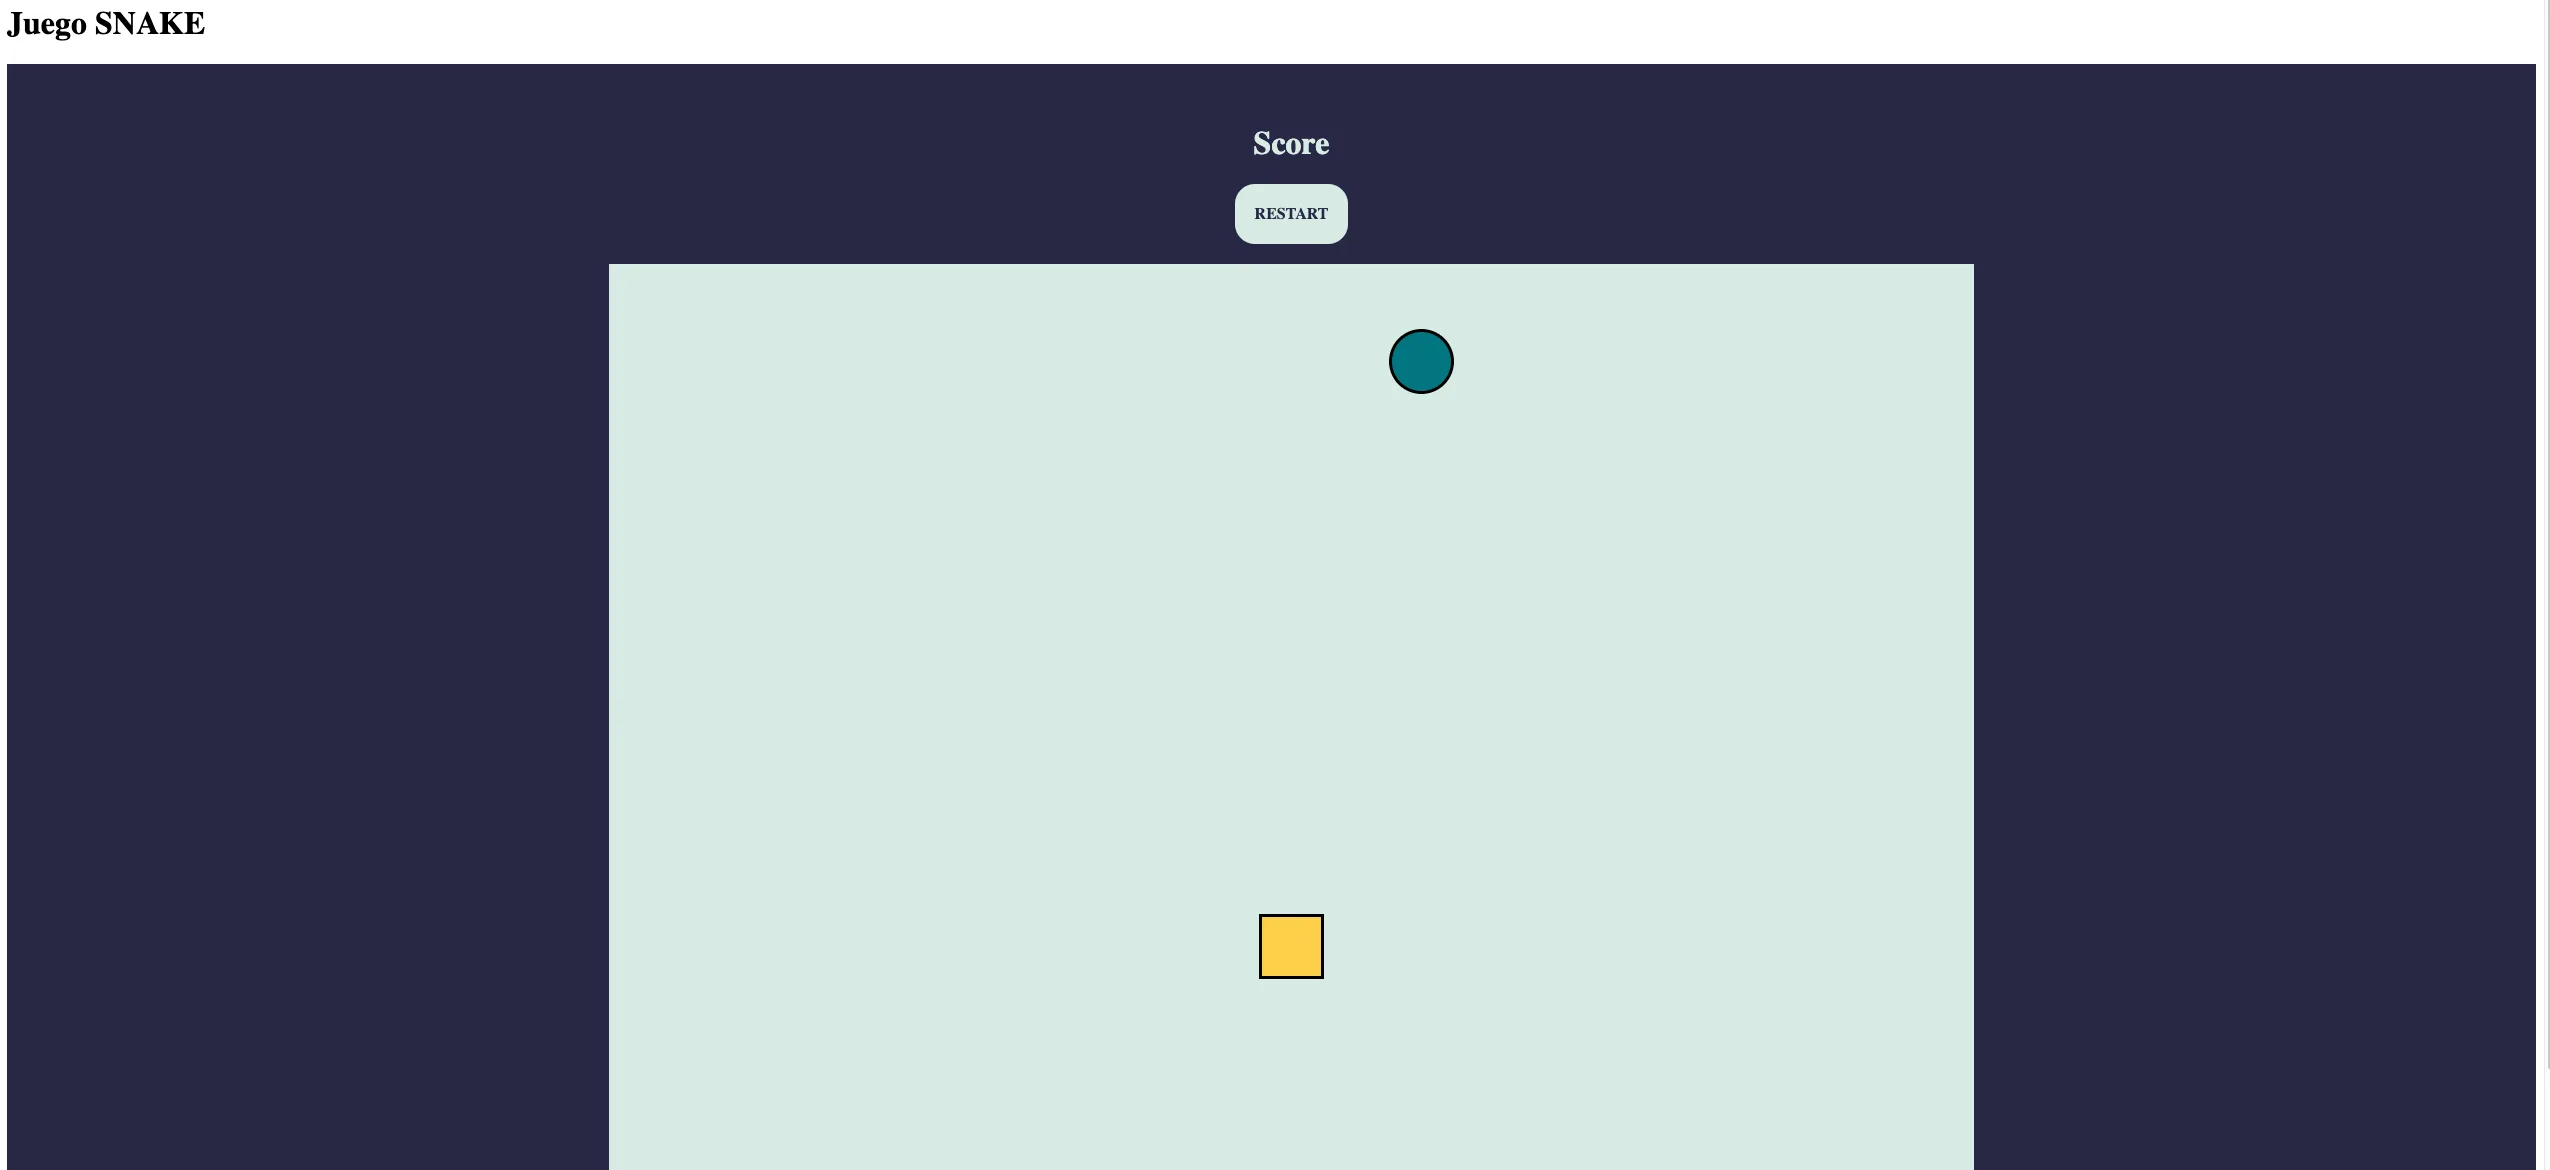
Con todo ello ya hemos conseguido dibujar la serpiente y la recompensa.
Ahora toca implementar el código para la gestión del teclado, el movimiento de la serpiente y la gestión de las recompensas. Empezaremos por la gestión del teclado.
Existen dos mecanismos, por una parte, cuando estemos en un ordenador, utilizaremos la gestión del teclado con las funciones del fichero game-engine/input.ts: que son:
inputDirection = { x: 0, y: 0 };
lastInputDirection = { x: 0, y: 0 };
getInputs() {
window.addEventListener('keydown', e => {
this.setDirection(e.key);
})
}
setDirection(direction: String) {
switch (direction) {
case 'ArrowUp':
if (this.lastInputDirection.y !== 0) break;
this.inputDirection = { x: 0, y: -1 };
break;
case 'ArrowDown':
if (this.lastInputDirection.y !== 0) break;
this.inputDirection = { x: 0, y: 1 };
break;
case 'ArrowLeft':
if (this.lastInputDirection.x !== 0) break;
this.inputDirection = { x: -1, y: 0 };
break;
case 'ArrowRight':
if (this.lastInputDirection.x !== 0) break;
this.inputDirection = { x: 1, y: 0 };
break;
}
}
getInputDirection() {
this.lastInputDirection = this.inputDirection;
return this.inputDirection;
}
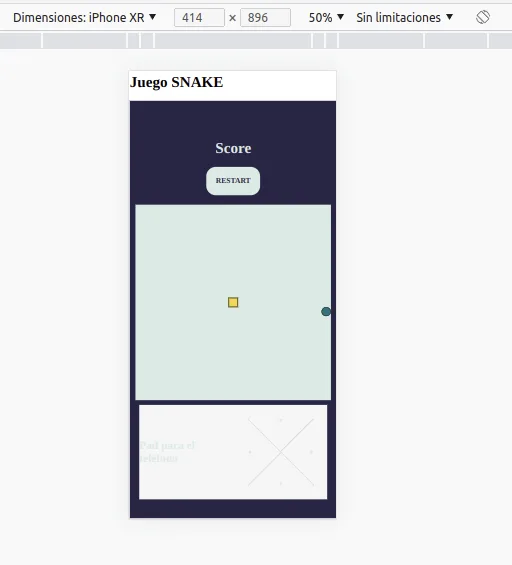
Para los teléfonos móviles, lo que hacemos es añadir una parte del código que corresponden a unos botones que simulan un pad. Para ello, añadiremos el siguiente código al app.component.html:
<div class="mobile-controls">
<h2>Pad para el teléfono</h2>
<nav class="o-pad">
<a class="up" (click)="dpadMovement('ArrowUp')"></a>
<a class="right" (click)="dpadMovement('ArrowRight')"></a>
<a class="down" (click)="dpadMovement('ArrowDown')"></a>
<a class="left" (click)="dpadMovement('ArrowLeft')"></a>
</nav>
</div>
Ahora será necesario añadir la lógica de los botones para los teléfonos, es decir, una acciones que simule el movimiento de presionar hacia arriba, abajo, derecha e izquierda. Además, aprovecharemos para añadir todas las funciones que se encargan de actualizar el tablero y reposicionar la serpiente.
Añadimos el siguiente código al app.component.ts:
ngOnInit(): void {
this.snake.listenToInputs();
}
dpadMovement(direction: string) {
this.snake.input.setDirection(direction);
}
Añadimos el siguiente código css para obtener la vista de un teléfono móvil:
.container2 .mobile-controls {
display: none ;
flex: 1 ;
}
.container2 .mobile-controls .o-pad {
position: relative ;
width: 200px ;
height: 200px ;
border-radius: 50% ;
overflow: hidden ;
}
.container2 .mobile-controls .o-pad:after {
content: "" ;
position: absolute ;
z-index: 2 ;
width: 20% ;
height: 20% ;
top: 50% ;
left: 50% ;
background: #ddd ;
border-radius: 50% ;
transform: translate(-50%, -50%) ;
display: none ;
transition: all 0.25s ;
cursor: pointer ;
}
.container2 .mobile-controls .o-pad:hover:after {
width: 30% ;
height: 30% ;
}
.container2 .mobile-controls .o-pad a {
display: block ;
position: absolute ;
-webkit-tap-highlight-color: rgba(255, 255, 255, 0) ;
width: 50% ;
height: 50% ;
text-align: center ;
transform: rotate(45deg) ;
border: 1px solid rgba(0, 0, 0, 0.2) ;
}
.container2 .mobile-controls .o-pad a:before {
content: "" ;
position: absolute ;
width: 60% ;
height: 60% ;
top: 50% ;
left: 50% ;
background: rgba(255, 255, 255, 0.1) ;
border-radius: 50% ;
transform: translate(-50%, -50%) ;
transition: all 0.25s ;
cursor: pointer ;
display: none ;
}
.container2 .mobile-controls .o-pad a:after {
content: "" ;
position: absolute ;
width: 0 ;
height: 0 ;
border-radius: 5px ;
border-style: solid ;
transform: translate(-50%, -50%) rotate(-45deg) ;
transition: all 0.25s ;
}
.container2 .mobile-controls .o-pad a.up {
bottom: 50% ;
left: 50% ;
transform: translate(-50%, -20%) rotate(45deg) ;
border-top-left-radius: 50% ;
z-index: 1 ;
}
.container2 .mobile-controls .o-pad a.up:hover {
background: linear-gradient(315deg, rgba(255, 255, 255, 0) 15%, rgba(255, 255, 255, 0.4) 100%) ;
}
.container2 .mobile-controls .o-pad a.up:before {
left: 57% ;
top: 57% ;
}
.container2 .mobile-controls .o-pad a.up:after {
left: 53% ;
top: 53% ;
border-width: 0 var(--tri-lrg-a) var(--tri-lrg-b) var(--tri-lrg-a) ;
border-color: transparent transparent var(--arrowcolor) transparent ;
}
.container2 .mobile-controls .o-pad a.up:active:after {
border-bottom-color: #333 ;
}
.container2 .mobile-controls .o-pad a.down {
top: 50% ;
left: 50% ;
transform: translate(-50%, 20%) rotate(45deg) ;
border-bottom-right-radius: 50% ;
z-index: 1 ;
}
.container2 .mobile-controls .o-pad a.down:hover {
background: linear-gradient(135deg, rgba(255, 255, 255, 0) 15%, rgba(255, 255, 255, 0.4) 100%) ;
}
.container2 .mobile-controls .o-pad a.down:before {
left: 43% ;
top: 43% ;
}
.container2 .mobile-controls .o-pad a.down:after {
left: 47% ;
top: 47% ;
border-width: var(--tri-lrg-b) var(--tri-lrg-a) 0px var(--tri-lrg-a) ;
border-color: var(--arrowcolor) transparent transparent transparent ;
}
.container2 .mobile-controls .o-pad a.down:active:after {
border-top-color: #333 ;
}
.container2 .mobile-controls .o-pad a.left {
top: 50% ;
right: 50% ;
transform: translate(-20%, -50%) rotate(45deg) ;
border-bottom-left-radius: 50% ;
border: none ;
}
.container2 .mobile-controls .o-pad a.left:hover {
background: linear-gradient(225deg, rgba(255, 255, 255, 0) 15%, rgba(255, 255, 255, 0.4) 100%) ;
}
.container2 .mobile-controls .o-pad a.left:before {
left: 57% ;
top: 43% ;
}
.container2 .mobile-controls .o-pad a.left:after {
left: 53% ;
top: 47% ;
border-width: var(--tri-lrg-a) var(--tri-lrg-b) var(--tri-lrg-a) 0 ;
border-color: transparent var(--arrowcolor) transparent transparent ;
}
.container2 .mobile-controls .o-pad a.left:active:after {
border-right-color: #333 ;
}
.container2 .mobile-controls .o-pad a.right {
top: 50% ;
left: 50% ;
transform: translate(20%, -50%) rotate(45deg) ;
border-top-right-radius: 50% ;
border: none ;
}
.container2 .mobile-controls .o-pad a.right:hover {
background: linear-gradient(45deg, rgba(255, 255, 255, 0) 15%, rgba(255, 255, 255, 0.4) 100%) ;
}
.container2 .mobile-controls .o-pad a.right:before {
left: 43% ;
top: 57% ;
}
.container2 .mobile-controls .o-pad a.right:after {
left: 47% ;
top: 53% ;
border-width: var(--tri-lrg-a) 0 var(--tri-lrg-a) var(--tri-lrg-b) ;
border-color: transparent transparent transparent var(--arrowcolor) ;
}
.container2 .mobile-controls .o-pad a.right:active:after {
border-left-color: #333 ;
}
.container2 .mobile-controls .o-pad a:hover:after {
left: 50% ;
top: 50% ;
}
.container2 {
padding: 20px ;
color: #d8ebe4 ;
display: flex ;
justify-content: space-between ;
/* flex-direction: column */
flex-direction: column ;
align-items: center ;
}
.score-card {
padding: 20px ;
color: #d8ebe4 ;
display: flex ;
justify-content: space-between ;
/* flex-direction: column */
flex-direction: column ;
align-items: center ;
}
.container2{
display: flex ;
justify-content: center ;
align-items: center ;
flex-direction: column ;
}
.score-card .score-board {
display: flex ;
justify-content: center ;
align-items: center ;
flex-direction: column ;
}
.container2 .score-card .restart-button {
padding: 10px 20px ;
color: #282846 !important ;
border-radius: 20px ;
height: 40px ;
font-weight: bold ;
display: flex ;
justify-content: center ;
align-items: center ;
background-color: #d8ebe4 ;
cursor: pointer ;
z-index: 99 ;
}
.container2 .game-board {
background-color: #d8ebe4 ;
/* width: 100vmin ; */
width: 100vmin ;
height: 100vmin ;
display: grid ;
align-self: center ;
grid-template-rows: repeat(21, 1fr) ;
grid-template-columns: repeat(21, 1fr) ;
}
.container2 .game-board.blur {
filter: blur(4px) ;
}
.game-over {
position: fixed ;
display: flex ;
justify-content: center ;
align-items: center ;
height: 100% ;
width: 100% ;
color: #fed049 ;
z-index: 1 ;
-webkit-text-stroke-width: 1px ;
-webkit-text-stroke-color: black ;
}
.game-over h1 {
font-size: 3em ;
}
@media only screen and (max-width: 1025px) {
.container {
flex-direction: column;
}
.container .score-card {
flex-direction: column !important;
}
.mobile-controls {
background-color: whitesmoke;
margin-top: 10px;
display: flex !important;
justify-content: center;
align-items: center;
width: 100%;
}
}
Primero actualizamos el código de forma que vayamos actualizando la vista a la par que vamos avanzando con la serpiente por la pantalla. Entonces, cómo funciones principales que añadiremos al app.component.ts tenemos:
update() {
this.snake.update();
this.food.update();
this.checkDeath();
}
start(currentTime: any) {
if (this.gameOver) {
return console.log('Game Over');
}
window.requestAnimationFrame(this.start.bind(this));
const secondsSinceLastRender = (currentTime - this.lastRenderTime) / 1000;
if (secondsSinceLastRender < 1 / this.snakeSpeed) {
return;
}
this.lastRenderTime = currentTime;
this.update();
this.draw();
}
checkDeath() {
this.gameOver = outsideGrid(this.snake.getSnakeHead()) || this.snake.snakeIntersection();
if (!this.gameOver) {
return;
}
this.gameBoard.classList.add('blur');
}
get snakeSpeed() {
const score = this.food.currentScore;
if (score < 10) {
return 4;
}
if (score > 10 && score < 15) {
return 5;
}
if (score > 15 && score < 20) {
return 6;
}
return 7;
}
A continuación tenemos en la vista que añadir el score con la puntación que mostramos a continuación: <div class="score-card">
<div class="score-board">
<h1>Score</h1>
<h3>{{food?.currentScore}}</h3>
</div>
<div class="restart-button" >
RESTART
</div>
</div>
<div class="game-over" *ngIf="gameOver">
<h1>Game Over</h1>
</div>
El resultado lo podéis visitar en la web https://1938.com.es/snake-angular Recordar que, el repositorio lo podéis descargar de la siguiente dirección: https://github.com/al118345/snakeGame1938Web además, el repositorio original lo podeis encontrar en la siguiente dirección https://github.com/al118345/Angular-Snake-Game